treesitter是neovim的一个支持编程语言解析的LSP的管理工具,在Linux下支持的很好,但是Windows下如果用它来安装各种语言的LSP,就容易报错,我发现原因是安装某种语言的LSP是通过GitHub进行下载的,然后其中一个语言,lua的lsp安装下来库是.so,Windows下没办法编译。看了看官网的解决方式:Windows support · nvim-treesitter/nvim-treesitter Wiki,需要Windows上能使用clang或者其他的方式进行编译,比如使用scoop安装zig,然后将其在treesitter相关配置的.lua中设置为编译选项,而不是gcc等。

下面是一个Windows下从安装clang到配置、再到配置treesitter的一个简单教程如何在 Windows 11 上安装 neovim treesitter — How to install neovim treesitter on Windows 11,结合上面官网给出的解决方案进行处理就行

但是可能会遇到一些问题,比如里面修改powershel的配置文件,改完之后报错VS2017中“项目无法加载,因为它缺少安装组件”的解决方法_无法加载,因为它缺少安装组件。若要解决此问题,请使用以下选择启动 visual studio-CSDN博客缺少Microsoft.VisualStudio.Component.VC.Tools.x86.x64-腾讯云开发者社区-腾讯云。下面是我实践之后的解决方案:

首先就是不一定要按照他一样创建一个Powershell.ps1文件,我们使用自己现有的就行,之前配置powershell的oh-my-posh已经创建了一个$HOME\Documents\PowerShell\Microsoft.PowerShell_profile.ps1,我们直接在里面写上就行:

powershell7和powershell5位置不一样,PowerShell文件夹是7的,WindowsPowerShell文件夹是5的,之所以写入配置,是因为安装LSP在编译时调用的cmd命令,而cmd命令无法自己加载VS的clang环境,需要在启动powershell的时候利用powershll的启动配置文件启动,所以在这个powershell下打开nvim,然后nvim在窗口下打开并执行cmd终端运行安装命令,这样cmd就也处于clang环境下了。所以如果你配置nvim,想要在powershell5下安装LSP,就改powershell5的配置,否则改7的。

powershell
1
2
3
4
5
6
7
8
9
10
11
12
oh-my-posh init pwsh --config 'C:\Users\PC\AppData\Local\Programs\oh-my-posh\themes\montys.omp.json' | Invoke-Expression


$vsPath = &"${env:ProgramFiles(x86)}\Microsoft Visual Studio\Installer\vswhere.exe" -latest -products * -requires Microsoft.VisualStudio.Component.VC.Tools.x86.x64 -property installationpath

Write-Host "Microsoft Visual Studio path = '$vsPath'"

# Use module `Microsoft.VisualStudio.DevShell.dll`
Import-Module (Get-ChildItem $vsPath -Recurse -File -Filter Microsoft.VisualStudio.DevShell.dll).FullName

Enter-VsDevShell -VsInstallPath $vsPath -SkipAutomaticLocation -DevCmdArguments '-arch=x64'

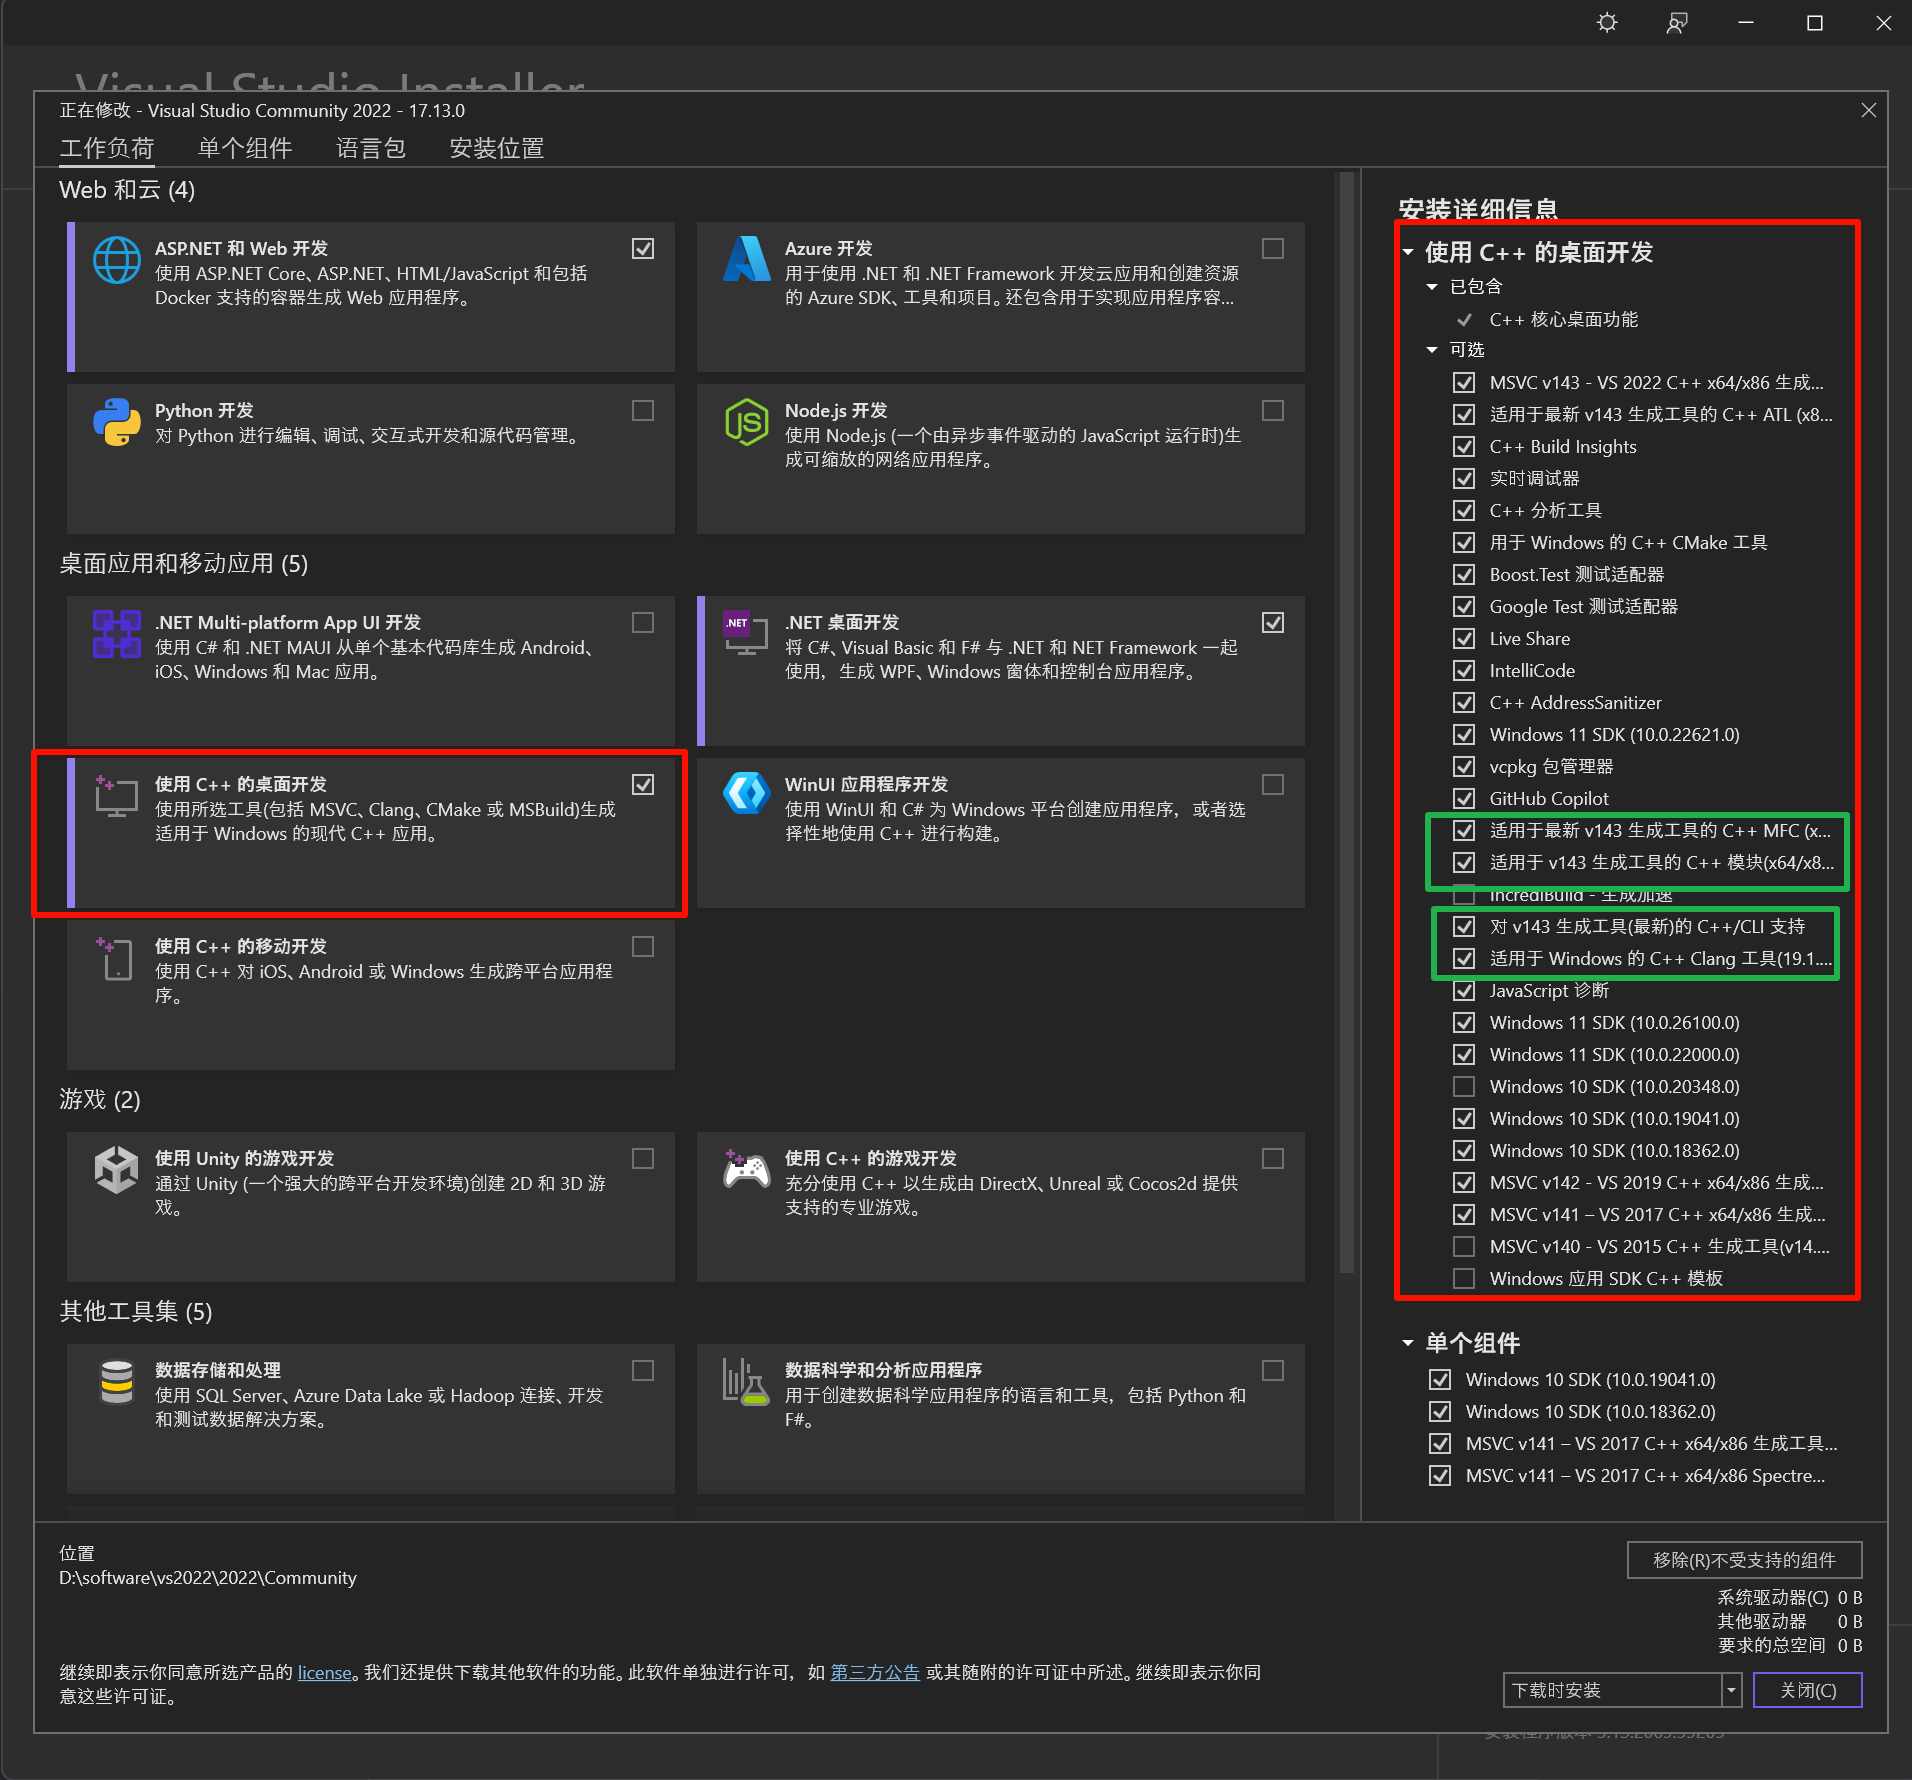
VS安装管理器中,左边选C++开发工具包,右边把绿色的选上。

image-20250213001252144

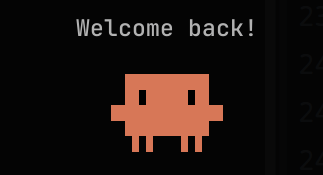
这样之前配置的powershell.ps1就能正常运行,打开一个终端显示:成功了

image-20250213001344991

之后可以按照教程继续操作了。

我参考教程及官网,以及之前修改logo的经验,在lua下的config文件夹下新建了一个my-treesitter.lua的文件夹,然后lazyvim官网的配置LazyVim — TreeSitter | LazyVim拷贝进来,最后在最下面的config = function的方法体中加入了上面treesitter官方为支持Windows配置的链接中给出的一些建议,设置treesitter的installer的构建工具:

lua
1
require("nvim-treesitter.install").compilers = { "clang", "gcc" }

在这里我并没有按照官方的建议禁用掉使用git进行下载,因为我发现禁用了之后我下载语言LSP的时候会报无法连接,请检查网络的错误,不禁用的话则会正常

对了,不要忘了在lazyvim官方给出的配置大括号最前面加上return,至于为什么,powershell配置+lua{}报错 - Kimi.ai这里面给出了解释。

下面是完整的my-tree-sitter.lua的配置内容:

lua
1
2
3
4
5
6
7
8
9
10
11
12
13
14
15
16
17
18
19
20
21
22
23
24
25
26
27
28
29
30
31
32
33
34
35
36
37
38
39
40
41
42
43
44
45
46
47
48
49
50
51
52
53
54
55
56
57
58
59
60
61
62
63
64
65
66
67
68
69
70
71
72
73
74
75
76
77
78
79
80
81
82
return {
"nvim-treesitter/nvim-treesitter",
version = false, -- last release is way too old and doesn't work on Windows
build = ":TSUpdate",
event = { "LazyFile", "VeryLazy" },
lazy = vim.fn.argc(-1) == 0, -- load treesitter early when opening a file from the cmdline
init = function(plugin)
-- PERF: add nvim-treesitter queries to the rtp and it's custom query predicates early
-- This is needed because a bunch of plugins no longer `require("nvim-treesitter")`, which
-- no longer trigger the **nvim-treesitter** module to be loaded in time.
-- Luckily, the only things that those plugins need are the custom queries, which we make available
-- during startup.
require("lazy.core.loader").add_to_rtp(plugin)
require("nvim-treesitter.query_predicates")
end,
cmd = { "TSUpdateSync", "TSUpdate", "TSInstall" },
keys = {
{ "<c-space>", desc = "Increment Selection" },
{ "<bs>", desc = "Decrement Selection", mode = "x" },
},
opts_extend = { "ensure_installed" },
---@type TSConfig
---@diagnostic disable-next-line: missing-fields
opts = {
highlight = { enable = true },
indent = { enable = true },
ensure_installed = {
"bash",
"c",
"cpp",
"diff",
"html",
"javascript",
"jsdoc",
"json",
"jsonc",
"lua",
"luadoc",
"luap",
"markdown",
"markdown_inline",
"printf",
"python",
"query",
"regex",
"toml",
"tsx",
"typescript",
"vim",
"vimdoc",
"xml",
"yaml",
},
incremental_selection = {
enable = true,
keymaps = {
init_selection = "<C-space>",
node_incremental = "<C-space>",
scope_incremental = false,
node_decremental = "<bs>",
},
},
textobjects = {
move = {
enable = true,
goto_next_start = { ["]f"] = "@function.outer", ["]c"] = "@class.outer", ["]a"] = "@parameter.inner" },
goto_next_end = { ["]F"] = "@function.outer", ["]C"] = "@class.outer", ["]A"] = "@parameter.inner" },
goto_previous_start = { ["[f"] = "@function.outer", ["[c"] = "@class.outer", ["[a"] = "@parameter.inner" },
goto_previous_end = { ["[F"] = "@function.outer", ["[C"] = "@class.outer", ["[A"] = "@parameter.inner" },
},
},
},
---@param opts TSConfig
config = function(_, opts)
-- require("nvim-treesitter.install").prefer_git = false
require("nvim-treesitter.install").compilers = { "clang", "gcc" }
if type(opts.ensure_installed) == "table" then
opts.ensure_installed = LazyVim.dedup(opts.ensure_installed)
end
require("nvim-treesitter.configs").setup(opts)
end,
}

最后也是配置成功了,因为此前lua的LSP总是安装不出来,现在成功了,也能高亮显示了:
image-20250213003341247

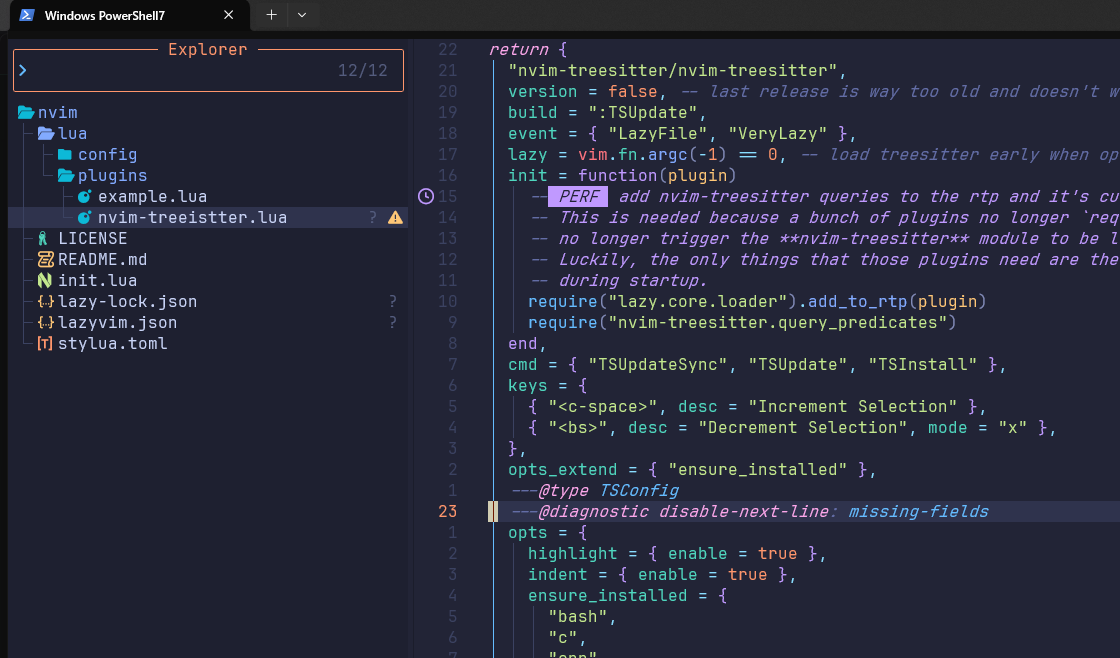
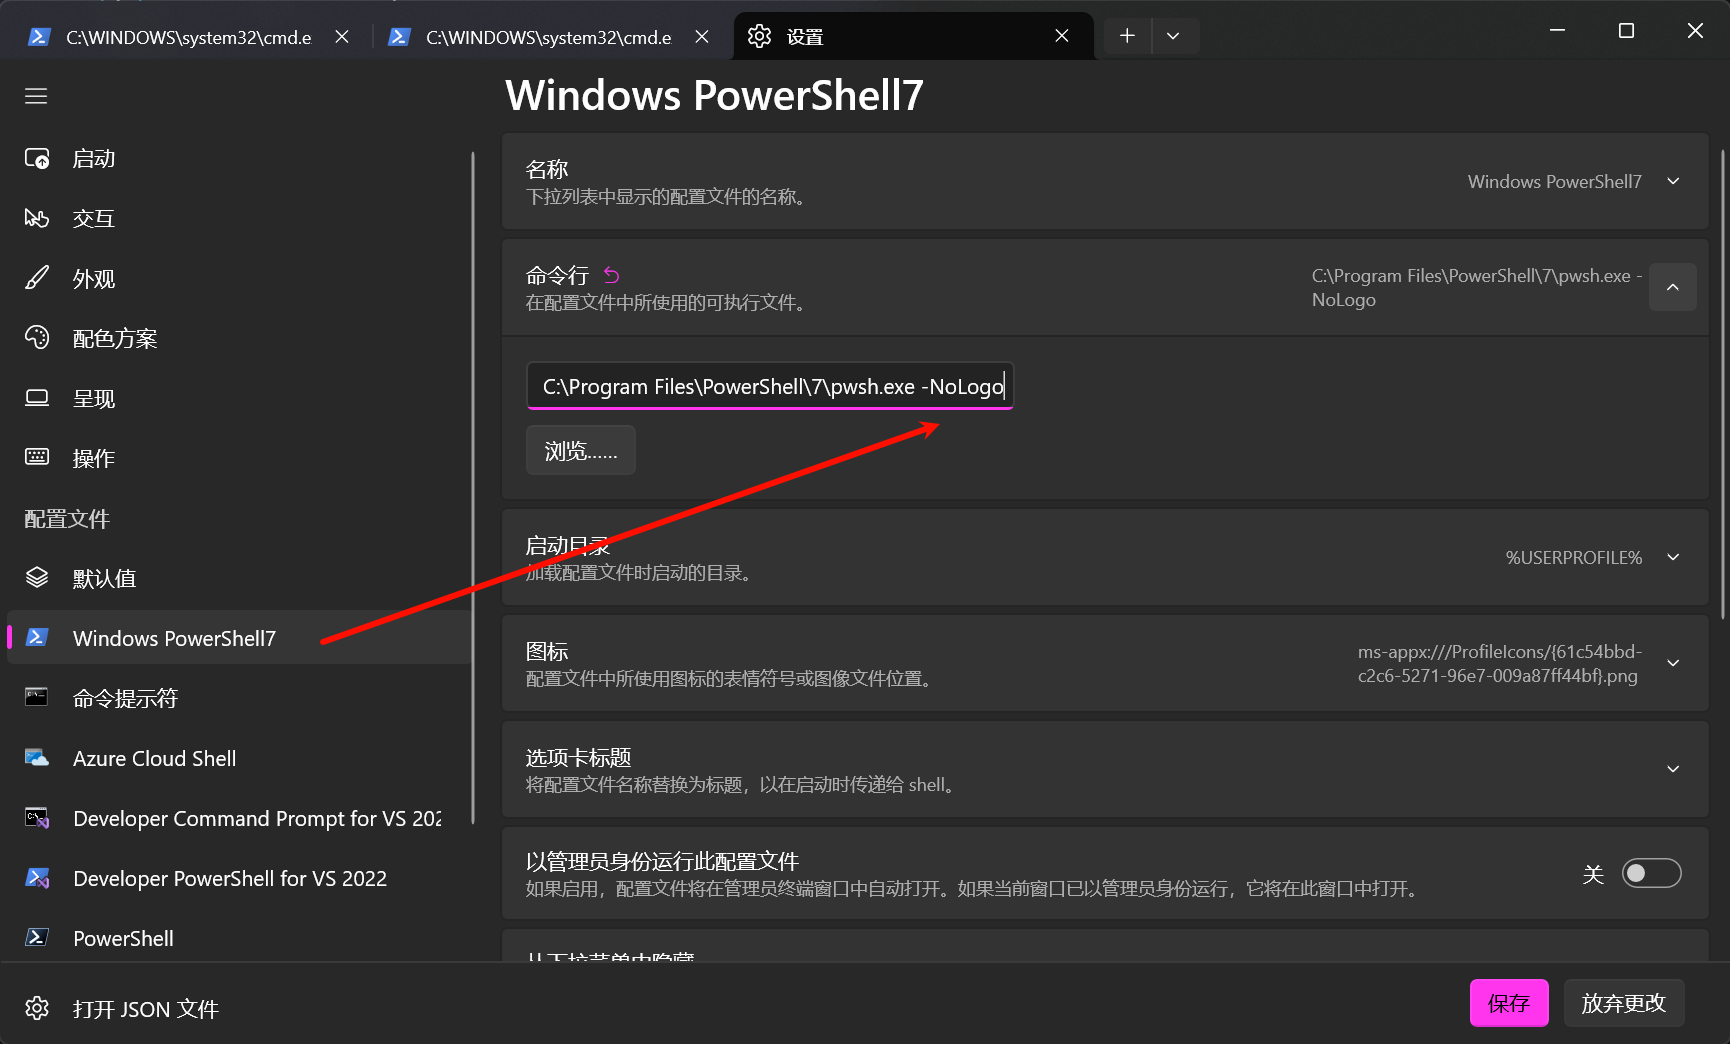
如果不想要终端打印信息/终端打开速度太慢:

  1. 有种方法,我们改powershel5的启动文件,即C:\Users\你的用户名\Documents\WindowsPowerShell\Microsoft.PowerShell_profile.ps1而不是powershell7的配置文件C:\Users\你的用户名\Documents\PowerShell\Microsoft.PowerShell_profile.ps1

    然后平时使用nvim的时候使用powershell7,而想要安装或者更新LSP的时候,使用powershell5打开,然后更新nvim的LSP。

    这种方式确实是可以的。

  2. 终端不想打印启动信息:在启动powershell程序最后加上参数-NoLogo

    image-20250213232736429